
BEETLES PROJECT IDEAS for PEEL.STICK.STITCH. Packs
Something colorful is creeping your way!
While PEEL.STICK.STITCH. packs are all about you and your creativity, this is the place to be if you need a little extra guidance or project inspiration! This page will continue to evolve as Sarah dreams up new applications for these designs!
Project Idea: stretched ‘canvas’ artwork
Use your PEEL.STICK.STITCH. pack to create a new artwork for your wall! Despite its title, you can use any fabric you like with painting or needlepoint stretcher bars, not just canvas.
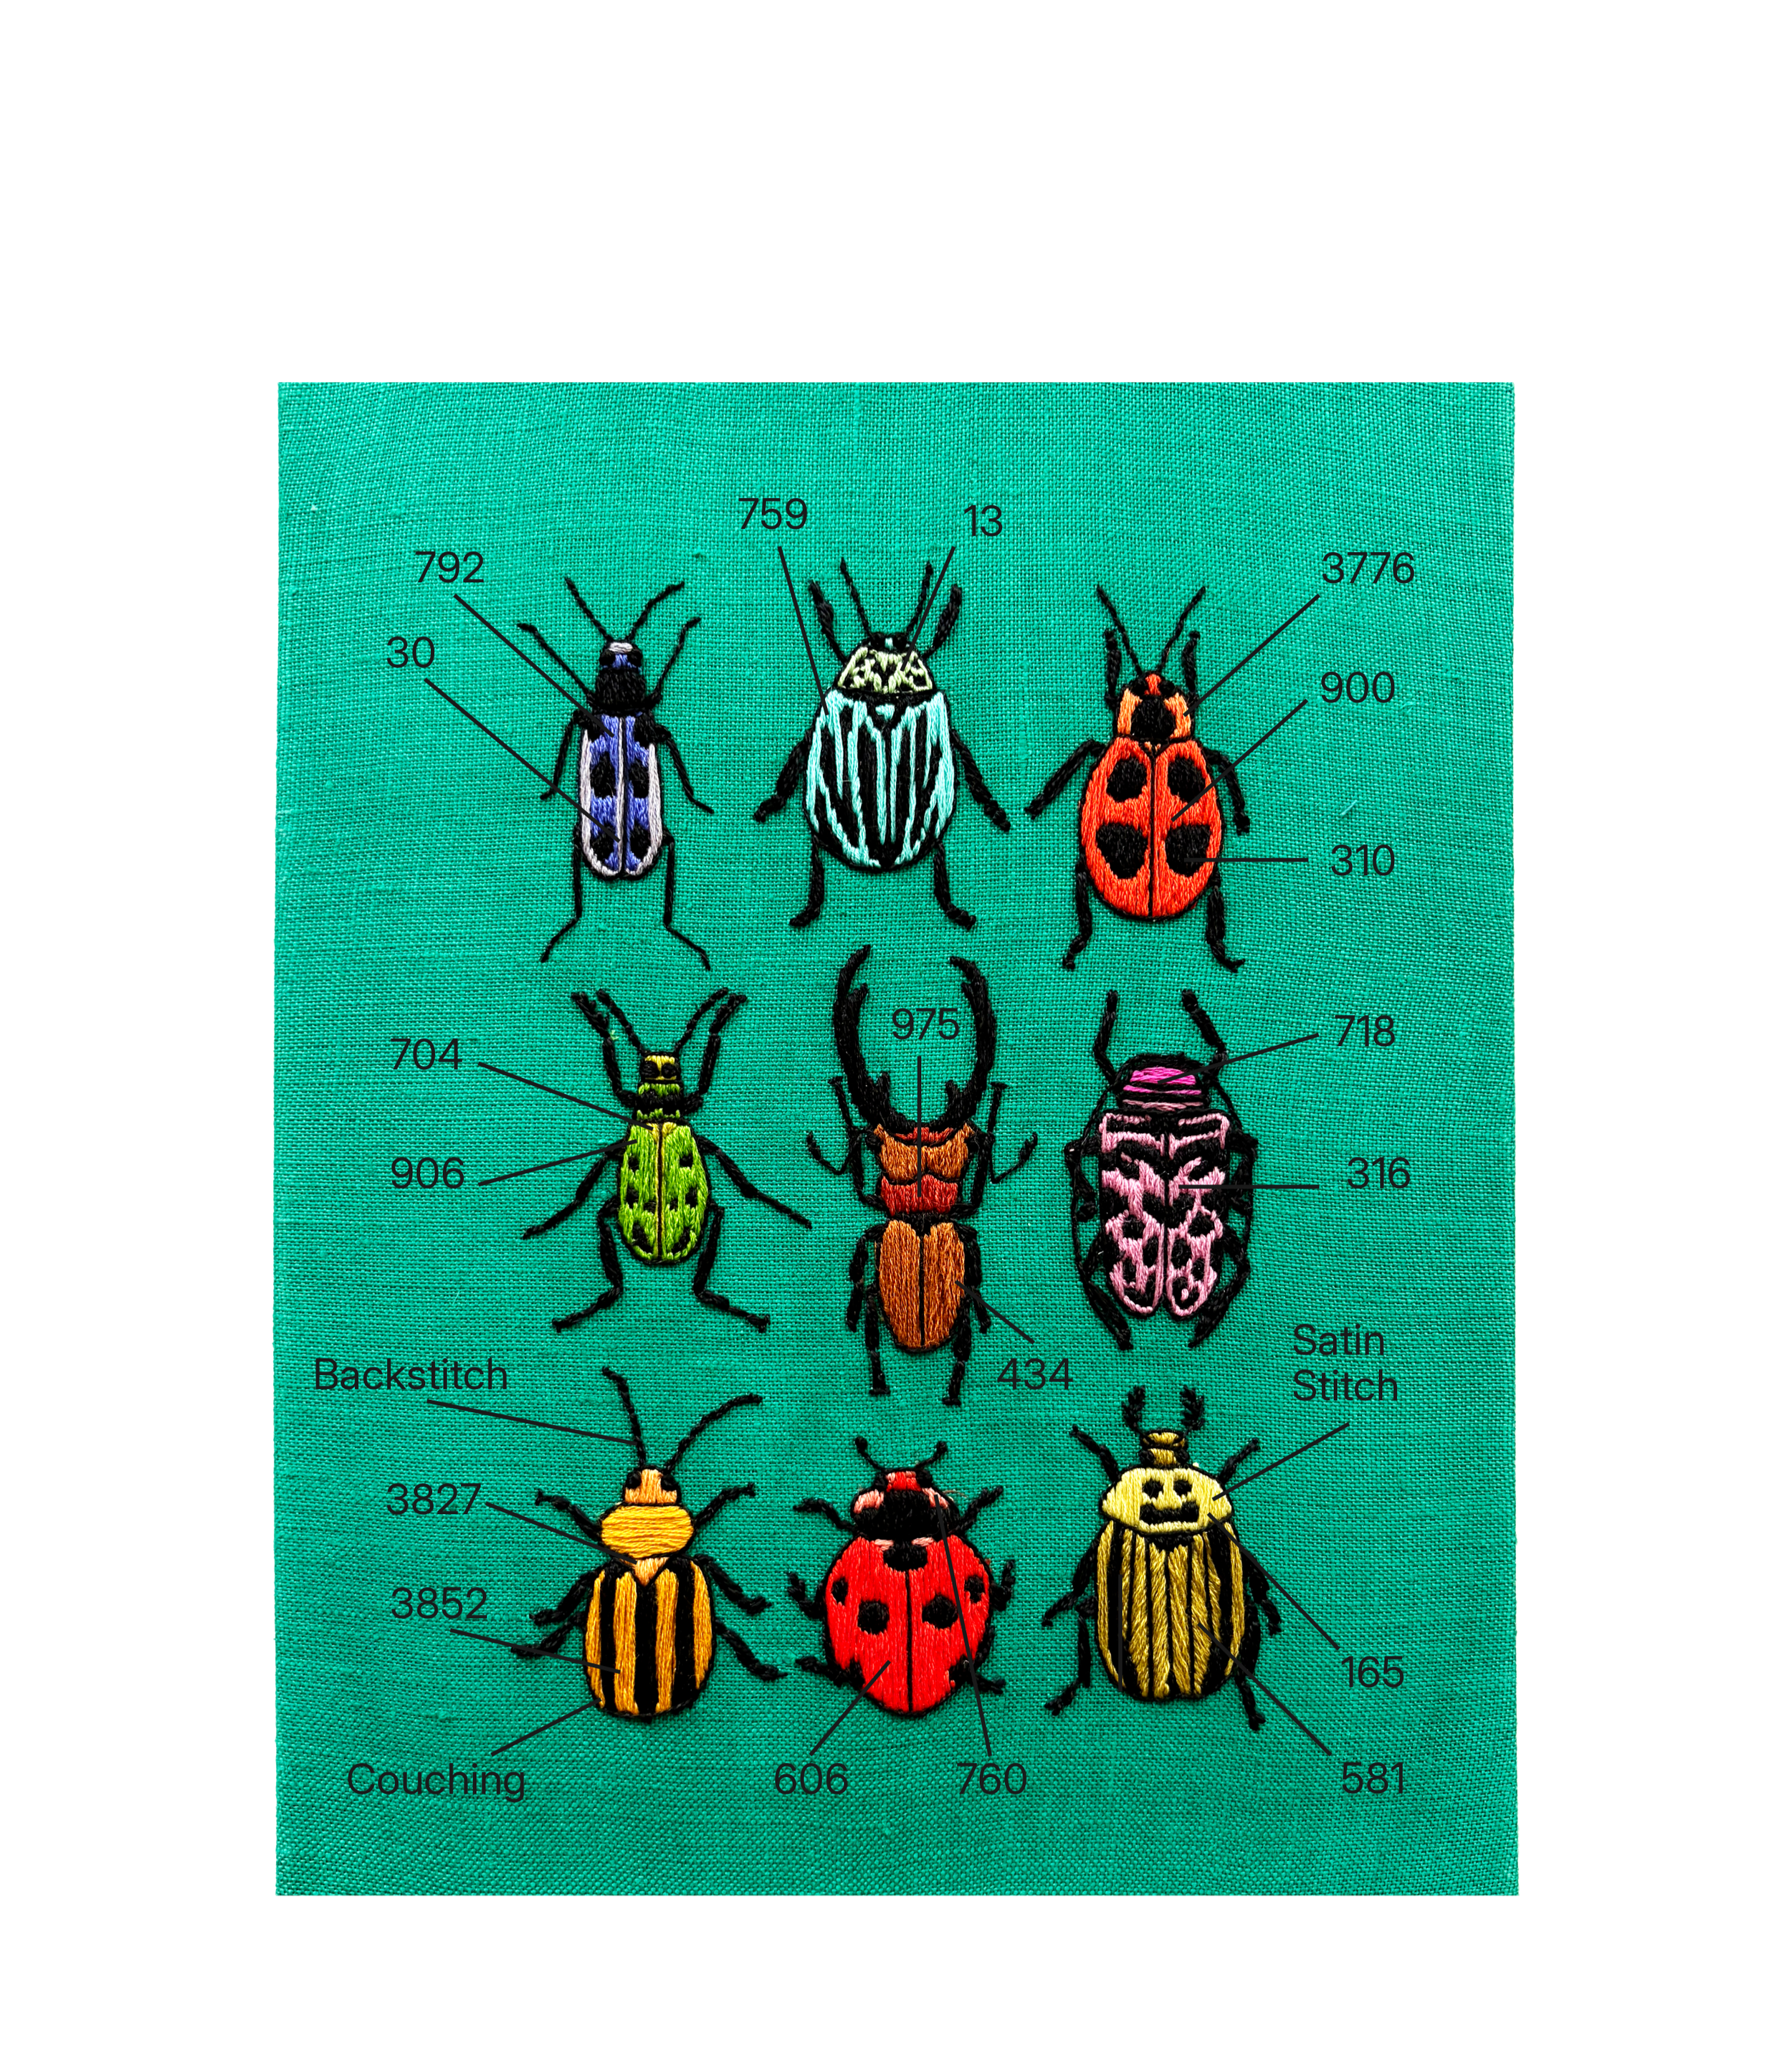
suggested materials:
Your favorite pre-washed fabric cut to at least 12 x 14 inches. I used a piece cut from a thrifted tablecloth, exact material unknown.
Two 8-inch wooden stretcher bars
Two 10-inch wooden stretcher bars. Painting or needlepoint stretchers both work well.
Staple gun and staples
Needle(s). Size 5 embroidery needle or size 20 chenille needle are both great options.
Scissors for fabric and thread
Hot water for rinsing away excess stabilizer
suggested colors:
DMC Embroidery Floss: 13, 30, 165, 310, 316, 434, 581, 606, 704, 718, 760, 792, 900, 906, 3776, 3827, 3852
method:
Assemble your stretcher bars and stretch your fabric. Make sure your fabric is pre-washed for best result. (New fabric shrinks!)
Peel the backing off of your Beetles transfer, center it on your stretched fabric, and press to stick. Make sure none of the design is directly overlapping the wooden stretcher bars under the fabric. If you hold the ‘canvas’ up to a bright window, you should be able to see where those edges are and reposition the pattern if necessary.
Thread your needle with three strands of embroidery floss and start stitching! Use vertical satin stitch to fill in the colorful sections of each beetle. Use backstitch to create the legs and antenna on each bug, and use couching to outline each shape to finish the piece. Need a refresher on stitch techniques? Find an illustrated stitch glossary here!
Rinse off excess stabilizer using hot water and let dry. Hang directly on the wall or pop your new artwork into a frame for display!
tips:
This project also fits well into a 9-inch embroidery hoop if you’d rather not stretch fabric over a wooden frame.
Or maybe you’d rather use these colors to create individual beetles on mini hoops!
Whether you stretch your fabric first and then stitch, or stitch and then stretch (both are valid), you’ll get the best results if your fabric is tight like a drum.
It’s ok if your stretcher bars get wet when rinsing away the stabilizer, but extended soaking and full saturation of the wood can lead to warping.
These are all just recommendations! Allow yourself the freedom to explore and experiment and take a break if you aren’t having fun.
